Tuesday, December 23, 2014

Cream Cheese Braid & Chocolate Cream Cheese Braid

My Mom has been making Cheese Braid ever since I was a child.  She makes it every year at Christmas, otherwise only with major begging.  As she quit wanting to bake this anymore...I starting tossing the recipe around in my head and altering a bit.  I have baked it several times, trying to get it just right...this is the version I landed on and definitely think is JUST right...but you can add anything you like to the filling...lemon curd, raspberry preserves, fig, cherries, blueberries or even cinnamon and brown sugar is divine!  

The subtleness of the almond in the pastry coupled with the tangy cream cheese is definitely one of my favorites!  My Mom adds almond to the drizzle on hers, which is fantasma...but with the chocolate I just stick to good ol' vanilla!


What you need...yield - 2 amazing loaves of goodness

Sponge...
1 tablespoon active yeast
3/4 warm water
1/2 cup all purpose flour (I like King Arthur Organic)
1 tablespoon cane sugar or 3/4 tbsp real maple syrup or raw honey

Mix all ingredients until well combined, cover tightly with plastic wrap and set in a warm place for 20 minutes.  It will be frothy looking and gooey when it's ready!

Sponge
3/4 cup vanilla greek yogurt (I like Simply Chobani Vanilla)
1 stick unsalted butter, room temp
2 large eggs
1/2 cup granulated sugar/ cane sugar or 1/3 cup real maple syrup or 1/3 cup raw honey
5 cups all purpose flour
2 tsp almond extract
1 tsp salt
1 cup chocolate chips (optional)
1/4 cup demerara sugar

Using the paddle attachment, to the bowl of a mixer add butter, yogurt, eggs and sugar and mix well.   Add in sponge and almond and continue to mix on medium/low.   Mix 4 1/2 cups of flour with salt, begin adding mixture to the yogurt mixture slowly.  Once this is all incorporated it will be somewhat crumbly.  Change to the dough hook and allow mixer to knead dough for about 3 minutes or until gathered into a smooth ball.  Add more flour in little bits if necessary to achieve smoothness.  Place dough into a large lightly oiled bowl, cover with a tea towel and allow to rise in warm place for 1-2 hours until doubled in size.

While it rises, go ahead and make filling, set aside.
Filling
16 oz. cream cheese 
3/4 cup confectioners sugar or 2 tbsp. real maple syrup 
2 tsp vanilla
dash of salt
1 egg (+ 1 additional egg if you replace the confectioners sugar with maple)
Add all ingredients to a mixer and mix at medium until well blended.  

Divide dough into 2 even portions.  Mold the dough into a small square, place onto parchment and roll out until it is a rectangle, about 12" x 18".   Place your hand in the center of the dough and cut diagonal slits in matching numbers on either side of you hand (see pics).
Spoon half the filling mixture into the center and spread out down the center of the pastry.  Optional, sprinkle half of chocolate chips down the center on top of cream cheese filling.  

Gently fold ends of dough, at top and bottom, towards filling.  Then begin on either side and braid down the pastry, pulling from left then right across filling and repeating until all cuts have been braided up (see pics).  Gently pat down the sides of the pastry to secure the tightness of the braid.  Place pastry onto parchment lined baking sheet or silpat.  Spray lightly with cooking spray and sprinkle with demerara sugar.  Repeat for second pastry.  Cover with tea towel and allow to rise for 45 minutes.  Bake at 375 for 30 minutes or until golden brown.  Remove and allow to cool on a cooling rack.  Make drizzle and drizzle tops of pastry.  Once cooled, keep wrapped in the fridge!  Excellent serve warm or cold!

 Drizzle...
1 cup confectioners sugar
1 tsp caramel or maple extract
1tbsp brewed coffe (I use leftover from the am)
1 tablespoons milk
Mix completely and use a spoon to drizzle on cooling pastry, add more of less milk to achieve the consistency you like.  I like mine to be thicker, just barely able to drizzle! ;)


What you need...

Sponge - mix all ingredients, cover tightly and set in a warm place for 15 minutes.


After 15 minutes it will be frothy.

Add butter, yogurt, sugar and mix...then add sponge, and begin adding flour/salt mixture...

Once incorporated, change to dough hook and allow to knead for 3 minutes of until gathered into a smooth dough ball...

Cover with a tea towel and allow to rise for 1-2 hours or until doubled in size.  (At this point I covered the dough tightly and put it in the fridge overnight to finish later and it was fine)

Using parchment paper roll dough into about 10x15" rectangle.  Cut matching number of diagonal slits on either side.

Place half of the filling down the center...

Top with chocolate chips if you like, then fold ends up, curling them towards the filling.

Begin to braid from top to bottom, pulling from right then left, alternating until it is complete...

Pat down sides to secure...

Top with demerara sugar and spray lightly with cooking spray.


cover with tea towel and allow to rise for 45 minutes.  Preheat oven to 375F.

Bake for 30 minutes or until golden brown...

Make drizzle...

Use spoon to drizzle...

Serve warm or cold...

Pan Seared Ahi Tuna with Ginger Wasabi Sauce

Wasabi and Seafood....Lately, I cannot get enough!  I was on a mission for lobster, after my son had sat in Santa's lap and asked for shrimp and lobster over the weekend, but when I saw this gorgeous piece of tuna, I jumped on it too! So simple and totally ahhhmazing!


What you need...
yellowfin tuna, ahi grade (this was .65 lbs.)
1/8 cup tamari
1/8 cup rice wine vinegar
1 tablespoon sriracha
1 tablespoon minced garlic
1 tablespoon minced ginger root
1 tablespoon coconut oil

Rinse tuna and pat dry.  Place into a glass bowl.  Mix all remaining ingredients and pour over.  Refrigerate for 1 hour, turning every 15 minutes to coat in marinade.  Place coconut oil into a sauté pan and heat to high heat.  Place fish in pan and sear for 30 seconds per side until gently browned on all sides.  Let rest 2 minutes, slice and serve with wasabi sauce.

for the sauce...
1 tsp wasabi paste (water & wasabi powder 1:1)
the juice of 1/2 lime
2 tablespoons mayo
Mix to combine.


Saturday, December 20, 2014

Triple C Cookies (Chocolate, Cherry, Coconut Cookies)

These are my husbands favorite cookie...simply.  He likes to have them with a bowl of Cherry Garcia Ice Cream...that is probably his ultimate dessert.

I find that cherries are one of those things that either you like them, or you don't.  I think people relate the cherry flavor to medicine or those awful maraschino cherries in the jar with all that nasty syrupy stuff...and they don't REALLY know what cherries taste like.

I know that when I was pregnant with my son, I could NOT get enough Bing Cherries...I ate the mall the time...ever since, I love cherries!  But my love will never compare to that of my husband's...he just LOVES cherries.  His top 3 desserts would be Cherry Cobbler with Ice Cream, Cherry Ice Cream with Cobbler and these Cherry Cookies.  If there is a Cherry option, that IS what he picks...but these are simple and wonderful!

1 cup all purpose flour
1/2 tsp baking soda
1/4 tsp sea salt
1 stick plus 3 tablespoons unsalted butter, room temp
1/2 cup granulated sugar
1/2 cup brown sugar
1 egg
1 tsp vanilla
1 cup old fashion rolled oats
1 cup dark chocolate chips
1 cup dried tart cherries (this is really best when you get the big plump ones from Whole Foods or Fresh Market)
1/2 cup shredded coconut (I actually have used both sweetened and unsweetened and it's good both ways)
1/2 cup walnuts (optional)

Preheat oven to 325F and line baking sheets with parchment paper.  Gently combine and stir together the flour, baking soda and salt and set aside.  In the bowl of a mixer, add butter and both sugars, beat with paddle until light and fluffy.  Add the egg and vanilla and continue to mix on medium.  When that is completely incorporate begin to add in the flour mixture a little at a time until it is all combined.  Turn mixer to low and add in oats, chocolate, cherries, coconut and walnuts.  Scape the bottom with a spatula to make sure everything is combined.   Using a table spoon, scoop out even drops and place them on cookie sheet a couple of inches apart.  Bake for 14 minutes or until just beginning to bow non the edges.

These keep in a large ziploc bag or airtight container for several days and freeze well!  Yum!

Cookies, Cookies and more Cookies....


Nope, this is NOT a Duncan Hines ad...lol....this is a sampling of only half of the cookies that we've made this week!  I just wanted to show you just how versatile cake box cookies are!  And SOOOOOO simple!

The Basic Recipe...but when I say you can add anything...you really can and no one will know just how easy they were...well, other than me...hahah...

1 box of cake mix, any flavor
2 eggs
1/4 tsp baking powder
1/2 cup oil
1 tsp vanilla (I always add the vanilla, even with chocolate mixes)

Mix all ingredients completely, use a regular spoon to scoop out cookies onto parchment lined cookie sheet, bake at 350F for exactly 10 minutes.  These are ooey gooey chewy!!!

From left to right:

  • French Vanilla Basic recipe + M&Ms and Christmas Sprinkles
  • French Vanilla Basic Recipe + 1/4 cup brown sugar + 1/2 cup chocolate chips
  • Lemon Basic Recipe + the Zest of 1 lemon + Yellow Sanding Sugar Sprinkles
  • Devil's Food Cake Basic Recipe + 1/2 tsp Peppermint Extract + 1/3 cup crushed soft peppermint candies as sprinkles (these are REALLY good)
  • Devil's Food Cake Basic Recipe + 1 cup smashed Dark Chocolate Reeces Peanut Butter Cups + 1/4 cup Peanut Butter
Now tell me you can't do this????  


Thursday, December 18, 2014

Wasabi Crusted Snapper over Citrus Veggie Noodles with Wasabi Sauce

On Sundays I usually go up to the store and look for the freshest seafood I can find or we end up with steak, which certainly isn't like settling, but yesterday I lucked out on gorgeous fresh snapper.  I didn't know what I was going to do with it, but lately I have been seriously craving wasabi...and so this was born!


What you need...
Fresh Wild Snapper
1/4 cup panko
2 tablespoons parmesan
1 tablespoons rice vinegar
1 tablespoon water
1 tablespoon tamari
1 tsp wasabi powder

3 zucchinis, spiralized
1 cup carrot stix
1/2 orange
olive oil

alfafa sprouts

2 tablespoons mayonaise
1 tsp wasabi paste
juice of a lime
zest of 1 lime
1/4 tsp ground ginger

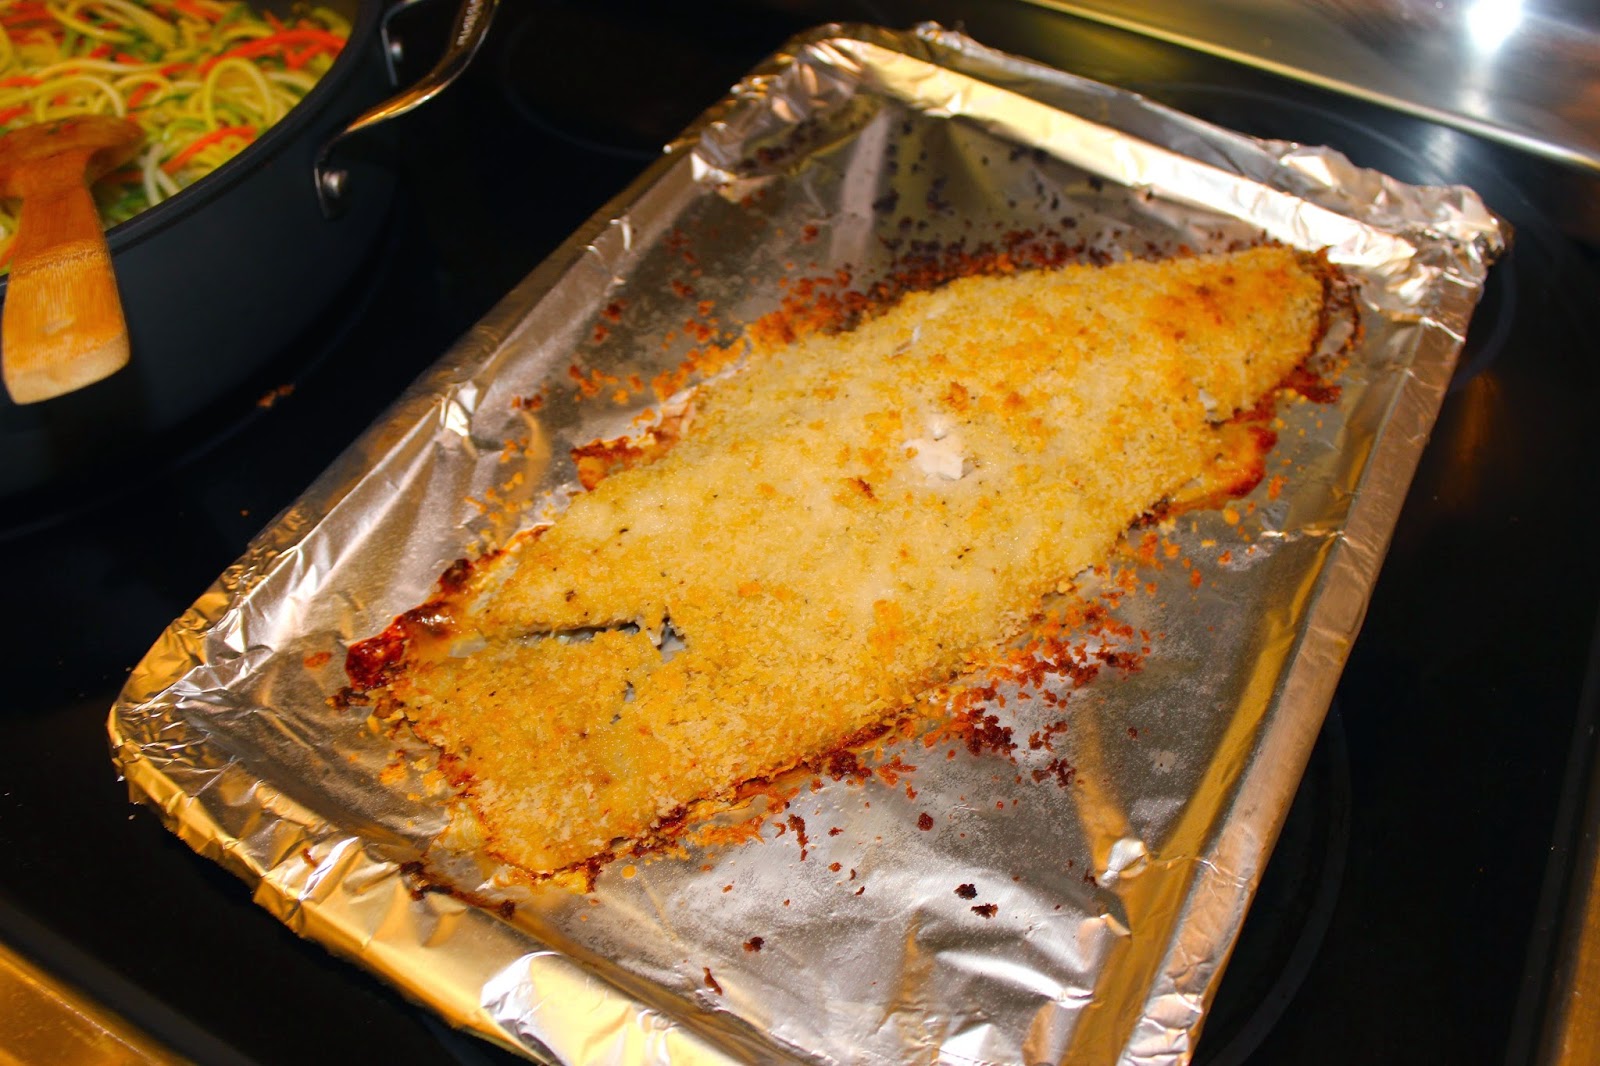
Preheat the oven to 350F.  Cover a baking sheet in foil and lightly grease, set aside.  Add the panko and parmesan to a plate, mix and spread it out for easy dredging.   Set aside.  To a small bowl, add vinegar, water, tamari and wasabi paste, stir to combine completely.  Set aside.  Rinse fish in cool water and pat dry.  Place the fish on the foil lined baking sheet and pour wasabi mix down center of fish.  Using your hands spread the mixture out rubbing it into the fish.  Gently dredge the fish in the panko mixture, pressing in down to get the panko to stick well to the fish.  Place the fish on the foil lined pan.  Place the fish into the oven and bake for about 20 minutes or until fish is white and flaky in the center.

Meanwhile, add 1 tablespoon olive oil to a sauté pan.  Heat to medium/high heat and add zucchini & carrot noodles.  Sauté 2-3 minutes, add the juice of 1/2 orange and gently toss.  Remove from heat and dish noodles on the serving plates.

In a small bowl, mix mayo, wasabi paste, lime juice and ginger.  Set aside.

When fish is flaky, add a portion of fish to the noodles, top with small handful of alfalfa sprouts and half of wasabi sauce.  Top with lime zest.  Serve.

It sort of seems like a lot of steps, but they are all quick and easy....and SOOOOOOOO worth it! Cheers!


Prepare panko, rinse fish with cool water and pat dry.

Mix wasabi powder, tamari, vinegar and water...


Prep your area with panko, wasabi mixture, foil lined pan...

Rub wasabi mixture into the fish...

Dredge in panko mixture and add to a foil lined pan.


Add noodles to olive oil, toss and turn to medium/high heat.

Saute for 2-3 minutes...

Add orange juice and toss...

Fish is done when it's white and flaky in the center, about 20 minutes.
Mix mayo, lime juice, wasabi paste, dash of ginger...


Add noodles to a serving plate, top with a portion of fish...

Add sports, sauce and lime zest!


Wednesday, December 17, 2014

Vegetable Beef Stew or Beetle Bug Stew to our kids!

When our son was little, like 1....and I was pregnant with the trifecta, one of the only ways I could get down a lot of veggies was in vegetable beef stew.  It was also a great way to get him to eat a variety of veggies.  I would tell him that it was actually beetle bug stew, and I would point out things in each spoonful, telling him that they were all kinds of craziness....ladybug wings, grasshopper heads, butterfly wings and beetle bugs of course!  Okay, so yes, it sounds kind of gross....but for my bug loving adventurous child...it worked!  Still does...now he tells the same tales to his sisters!

This "dump it all in and wait" soup, is simple and delicious, perfect to keep around in the Winter, and freezes beautifully!  I like to keep a container of it in the freezer for anytime a cold pops up, or you need to deliver a warm soup to someone in need!

Yesterday I knew that we had a dinner party to attend, and the grandparents were coming to put the kids to bed for us...they have had colds, so I thought this would be the perfect thing to toss together in the morning for an effortless dinner!  I had some leftover tenderloin scraps and a bit of grass fed stew meat too...made for a lovely combo!


What you need...
2 lbs. stew beef or beef scraps, cut into smalls cubes
1/2 onion, chopped
1 cups carrots, chopped
1 cup green beans, chopped
1 can fire roasted tomatoes
1 32 oz. beef broth
1 tsp. black pepper
1 1/2 tsp sea salt
1 12 oz. package organic Corn
1 12 oz. package organic Green Peas
1 can organic Northern Beans
1 can organic Dark Red Kidney Beans
1 can organic Black Beans


There are 2 ways to do this...both are equally simple.  Because I had loaned my crockpot out, I used a stockpot this go round!

So, I added a little olive oil to the pot, turned it up to high heat, tossed in all the meat and cooked to for 2 minutes, tossing it, to get it browned up a bit.  Then added everything right to that pot.  Bring it to a boil, then reduce to low and allow to simmer for about 4 hours.  Serve.

If you are using a crock pot, I would use a sauté pan and brown the meat just slightly before adding it to the crockpot.  This will help to keep it nice and tender!  But again, just dump all that goodness in and turn to low heat for 4-6 hours.  Serve.

What you need...

Chop fresh veggies...

Sauté beef for 2 minutes in olive oil

As meat begins to brown, add veggies...

stir...

keep adding all the goodness...bring to a boil, reduce to simmer...

simmer for 4-6 hours...