Nothing like a good cleanse to get you going, right? Well, the fridge (s) and pantry are another great place to start your Spring Cleaning! I'm not talking about tossing out last week's leftovers lurking in the back, although please do that too! I'm talking about really cleaning the inside of your fridges and getting them spotless and sanitized!
It's easy to overlook cleaning your fridges winces they stay filled with food! But, the drip here, and the drop there, and the shedding of herbs and such in the veggie drawer can leave little messes in there! So, grab yourself a big cooler, some vinegar and baking soda and let's get this party started!
Most households these days have an extra fridge; I know we could live without it! Both of ours are fully stocked and filled to the brim every Sunday. When you try to focus on fresh fruits, veggies and meats...your fridges get a real workout! Since I restock on Saturdays for the week, I like to do this on a Friday when the stock is at a minimum.
First, unload the fridge into the cooler. This is a great time to check dates and freshness on everything! Sometimes those condiments can get outdated and you don't realize it! So, check best by dates on everything and toss anything that's questionable! And, you know I always keep my list going! Make a note of anything you are tossing that needs replacing so you don't miss it on your next grocery order!
Once the fridge is unloaded, I take out the drawers and any removable shelves. Scrub them up in the sink with warm soapy water, and lay them out to dry. While they are air drying, I spray the inside of the fridge and anything that can't be removed, with white vinegar. You don't want to use any chemicals inside your fridge! Vinegar usually gets it all, but if you have any sticky, pesky spills that are tough, sprinkle a tiny bit of baking soda on them and they should scrub right off! Use a kitchen towel or paper towels to dry everything. Replace your shelves and reload! I like to wipe off any jars and bottles as I put them back in, making sure that none of them have any drips that can leave those sticky rings and cause a mess!
Now stand back and enjoy the view! A sparkly clean fridge just makes you want to reload with all the good for you stuff and keep clean - both the appliance and the food in there!!!!
For the pantry, I do the same thing! Pull it ALL out! Just get it empty! Wipe down all the shelves and then vacuum it out to make sure you get any dust or bits and pieces that might be in the nooks and crannies!
Go through everything and check dates! Sometimes those items you don't use that often will get outdated faster than you think! I like to store anything open in sealed containers or glass canisters. This will help keep any of your lesser used items fresh.
Now, put them all back, but think as you do this! Don't just put it all back like it was! There might be a better way! I like to put anything that I don't want the kids to have access to or anything they don't need, up on the higher shelves. I put their snacks and such down low where they can reach them. They love to help me make lunches, so I like any of those options to be in easy reach for them! The treat items are up high, otherwise one of them would be in there sneaking an extra! I use the top shelf for overflow of things such as Ziplocs and food storage stuff - you know, all the stuff you buy in bulk from Costco or Sam's, haha.
This is also such a good way to spark ideas for things you have made in a while, or prompt you to use things that are close dated! Turn that inventory!
Now....go meal plan for the week, place that grocery order and reload with healthy stuff!!!
Sunday, April 19, 2015
Friday, April 10, 2015
Spring into Spring with a little Home Organization! - Post #1
The birds are chirping, the flowers are bursting, the sun is out and Spring is here....finally! All I want to do is be outside soaking it all up....but...with the flowers came an intense amount of pollen this year. I haven't had allergies in over a decade...I am paying for that this Spring! So...I thought I would give April a chance to have a few of those showers that it's famous for, and let some of that lovely yellow curtain wash away, while I do some indoor Spring prep!
I had a couple requests for this one! So here goes...but be warned, this will have to be a series due to my OCD tendencies, heehe...I hope it motivates and helps someone!
So, admittedly I am a type A personality, pretty OCD. Okay, so I am VERY OCD...I get giddy over a freshly organized drawer and look forward to trash and recycle day ALL week because I love decluttering and organization so much. Yes, call me a freak...I don't mind...at least I am a neat & organized freak! ;)
Where to start....there is just so much. But if you want to make a huge impact with 1 task...my Tip #1 would be "keep it in the closet!" It's kind of annoying that you spend a ton of time working so hard cleaning out something that no one else will really see, but honestly it makes a huge difference and is so gratifying! It's sooooo easy to stick things in the closet and forget. When I say hit the closets, I mean ALL the closets. Of course, the obvious is cleaning out the kid's closets, switching out the Winter duds for the Springtime wardrobe, sifting through those things that are worn out or already a little snug. But don't pass by those other doors! The linen closet, coat closet, even that kitchen junk drawer...the one that everyone has! Once you get going...you might just get on a roll!
Knowing that I have limited time to attack projects like this, only possible while the kids are at school, I schedule myself. Let's be frank, children are little hoarders, you just pray they outgrow it! So they definitely cannot be home when you declutter! My kids can think of a reason to save a toilet paper tube or a the wrapper from some toy they broke ages ago. And the things that you find under bookcases, and in nooks - the Ultimate Treasure they've been searching for their whole life!
So, first, schedule yourself and make it a doable task. Don't plan to clean out all the closets in one day, unless you have the WHOLE day. My first day, I set my goal of attacking the main linen closet, and my son's closet.
For us, the linen closet is one big one that houses all of our sheets, beach towels, sleeping bags and a few other odds and ends that have just ended up there. Weed out the stained, ripped or old sheets. If it's been a while, you might have acquired a few sets that you no longer use. You might also determine that you need new sheets, that's fun! In my opinion, there is really no good reason to keep more than 1 change of sheets for each bed and for us that's a lot! But, I still got rid of 2 sets of sheets and several duvets. This is a great time to donate your old sheets, blankets, towels to the local Humane Society or other Animal Shelter.
I realize some of this can be annoying, I had a giant basket of vacuum attachments that I had to go through, half of them were for an old version of my new vacuum and I had to try each one to see which fit! Also, every year that your kids get older, there are things you grow out of! We had 4 humidifiers! Paring that down freed up some nice space! Now when I open that door...it's so much less cluttered and looks so nice, that I kinda want to take a book and a flashlight and hide out in there! lol...
Next, use this time to figured out what you need. When I cleaned out my son's closet I had to get rid of a lot of stuff! He is about to turn 6 and growing like a weed with Miracle Grow in his shoes. Hence, I kept a notepad at the ready and marked down everything I was getting rid of, so that I would be able to easily determine what he needed more of. His birthday is coming up in a month and that's the perfect way to replenish what I am handing over to his cousin! At this age, they grow so fast that a lot of his things hardly get used and are in great condition. Thankfully his cousin is a year behind him and loves nothing more than Tucker's clothes! I realized that the kid didn't have but a couple pairs of shorts and 1 bathing suit, so what do you think the Easter Bunny brought him? Yep, some swim trunks! I am all about taking an opportunity to get them the things the actually need!
Don't forget the socks and undies! Make sure that all the underwear are in good, clean condition and none of the elastic is shot! Kids his age are quick to just stick things back in their drawers rather than turn them in! Match up the socks! Everyone has strays everywhere. Yes, one day the match to that sock might show up....but really do you want to hang around for that? Make all the matches you can and toss the rest! If you don't you'll end up with one huge drawer of nothing but sock puppets!
The coat closet! Don't overlook this one! Kids outgrow jackets too and that is something that the consignment stores always need more of! Those are usually gently worn in this part of the country and make for a great consignment item! Plus, they take up so much room, it's a great thing to turn over! It seems like someone gets a new jacket every Christmas, and those things will pile up and go out of style too! Clear out the old ones that you know you won't wear again! This is a fantastic donation item as well! Don't forget The Good Shepard House of Wilmington or any other Homeless Shelter, when you have extra adult jackets on hand! When Winter rolls back around they will be looking for those!
Make sure to go ahead and get your donation items to wherever they are headed, or they will just be clutter in a different location!
Happy Friday! I hope this helps and motivates someone to get their Spring Clean on!
Sweet Potato Crusted "Anytime Casserole"
Around here, we love a "breakfast" casserole. That's really a silly name for it, because it's good anytime! In fact, I have a green smoothie every single day for breakfast, so I have my "anytime" casserole as my afternoon snack! It's pack with protein and yummy stuff to help me fight those afternoon urges!
Really you can toss anything in this casserole, these are the veggies I just happened to have on hand and needed to use up! Of course sausage makes a great addition, garlic is good in everything, even leftover asparagus tips! If you have leftover veggies or ones that are about to become garbage, toss them in!

What you need...
1 sweet potato, peeled
1/2 pint mushrooms, sliced
1 bell pepper, chopped
1/2 sweet onion, chopped
5 oz. package frozen spinach, thawed and drained
2 pints egg whites
salt & pepper
1/4 cup feta cheese (optional)
Preheat the oven to 400F. Lightly grease a deep dish baking dish. Mine was a 10" round. Run the sweet potato through a food processor fitted with the slicing blade or a mandolin (I used the mandolin). Pile the sweet potatoes into the dish, pressing them up on the side to form a crust. They will take up a lot of room! Pile on the veggies, I started with the onion and pepper, then mushrooms, spinach, and hit it with just a little salt and pepper. Then pour in ALL the egg whites. Bake for 40 minutes, remove from oven, top with feta and bake for 10 minutes longer or until set. Done!
 |
| What you need... |
 |
| Lightly grease your dish and add the sweet potatoes, pressing up the sides to form a crust. |
 |
| Pile in all your veggies... |
 |
| Pour the egg whites in... |
 |
| Bake for 40 minutes... |
 |
| Top with feta and return to oven for 10 minutes or until set... |
|
| Voila...how easy was that? |
Wednesday, April 8, 2015
Almond Crusted Chicken Parmesan over Zucchini Noodles
Whenever I get chilled or sick, I crave red saucey hot food, hahah. Baked ziti, lasagna, anything like that will do! This is a FANTASTIC substitute for the good ol carb packed, flour laden version! This has minimal dairy, which can easily be left out, the leftovers are just as good, and I promise it will not disappoint! Just look at it!
This is very similar to the almond crusted chicken tenders, so it can easily be made ahead to the same point. Once crusted, you can cover the chicken and leave it refrigerated until you are ready to bake it, making it a really quick and simple to the table!

What you need...
The chicken -
3-4 chicken breasts
1/2 cup almond meal
1/3 cup flax meal
1 egg
2 tablespoons buttermilk (you can sub water if necessary)
1 tsp Italian seasoning
6 turn each from grinder, salt & pepper
The Rest -
4 zucchini - noodled
2 cloves fresh garlic, minced
drizzle olive oil
1 cup of your favorite pasta sauce (I used HT Organics Tomato/Basil - just look for one without sugar)
1/2 cup shredded mozzarella or parmesan
a handful of fresh basil chiffonade
cooking spray
Preheat the oven to 400F. In a small bowl, mix egg and buttermilk and set aside. On a large plate, mix flax meal, almond meal, S & P, and Italian Seasoning set aside. Line a large baking sheet with foil and grease well. Set up assemble line, chicken, egg mixture, meal mixture, pan (see pics). Dip chicken, one at a time, into the egg mixture, gently shake off excess egg. Place chicken straight into meal mixture and turn to coat well. Gently press mixture into chicken, move each breast to the line baking sheet. Repeat with each breast. Once all are on the sheet, spray them well with cooking spray. (Here you can cover and refrigerate until needed or proceed.)
Place baking sheet into the oven (400F) and bake for 15 minutes. Turn chicken and bake for 15 additional minutes or until an internal temperature of 165F is reached. Remove chicken to a glass baking dish, top each breast with 1/4 cup sauce, return to oven for 10 minutes to warm sauce through. Then top each with 2 tablespoons cheese and 1/4 of the basil, return to oven for 10 minutes or until cheese is bubbly.
In the meantime, add oil and garlic to a large sauté pan, turn to medium high heat and immediately add noodles. Toss well and cook for 2 minutes just long enough to warm through and distribute garlic flavor. Plate noodles, top with chicken and serve!
 |
| What you need... |
 |
| Set up assembly line... |
 |
| Mix buttermilk and egg... |
 |
| Meal Mixture... |
 |
| Once crusted, spray with cooking spray... |
 |
| Spiralize the zucchinis... |
 |
| I made my noodles ahead and stored them in the fridge with the fresh basil until dinner... |
 |
| Here I was reheating! But same basic instruction, top cooked chicken breasts with 1/4 cup sauce, bake for 10 minutes or until sauce is warmed through... |
 |
| then top with cheese and basil and cook 10 more minutes until cheese is bubbly! |
 |
| Warm noodles in a saute pan with a small drizzle of olive oil and fresh garlic...tossing on medium/high heat for 1-2 minutes. |
 |
| Plate noodles, top with chicken and serve! |
 |
| Enjoy! |
Thursday, April 2, 2015
The Grill Bag
You want easy, yummy and fast?!?! No clean you say? If you have never done this, it pretty much works for anything! Look at all those nutritious veggies! And I promise you can't mess this up!

We had company coming the next day, and I had already cleaning the whole house and wanted to try to keep the kitchen work to a minimum before the hit town...so I kept everything outside! We grilled up some chicken breasts, this grill bag full of delicious veggies and had dinner al fresco! Zero clean up! What could be better than that?
What you need...
Really any combination of veggies you want!
I used:
1 lb. asparagus, trimmed to about 4"
1 zucchini, sliced to about 1/2" pieces
1 onion, quartered and pulled apart
1/2 pint mushrooms, quartered
1/2 lb brussels sprouts, trimmed and halved
1/2 bell pepper, sliced & then halved
1 can great northern beans, rinsed
2 tablespoons olive oil
fresh herbs
salt & pepper
(I like cherry tomatoes in this, but my husband can't stand warm tomatoes so I left them out)
Roll out 2 large pieces of heavy duty foil, crossing them to make a huge X. Pile on the veggies starting with the ones that take the longest to cook (onion, pepper, mushroom). Anything goes, pile on as much as you can fit! Drizzle with olive oil and top with salt and pepper, garlic if you'd like and any fresh herbs are delicious as well!
Fold up the foil, beginning with the bottom piece, followed by the top one. Then use 2 more large pieces of foil to double wrap the bag, making sure you seal it up as well as possible. Turn up the corners to help hold any possible leaks. Refrigerate until needed.
Generally I grill up my meat first, then just toss the bag onto the grill to cook while the meat rests! So, turn the grill to medium/high heat. Add grill bag to the grill on grill at medium/high for about 20 minutes. Remove to a pan, slice open the foil and serve right from the bag! Cheers!
 |
| What you need...anything goes! |
 |
| Lay out 2 large sheets of heavy duty foil, crossing them to make a huge X... |
 |
| Pile on the veggies...I usually put the ones that take longer to cook on the bottom (onion/pepper)...drizzle with olive oil and generously pepper & salt... |
 |
| Fold up the foo, bottom sheet first, followed by the top one...then use 2 more sheets to wrap again, either direction...it need to be tight and sealed. |
 |
| I turn the corners up to contain any possible leaks! Refrigerate until needed! |
 |
| Cook on grill at medium/high heat for about 20 minutes! Slice open and serve right from the foil! |
|
| So good...what could be easier? |
Wednesday, April 1, 2015
Love, Mom's Cutout Cookies - The Basics
When I started this blog I said I would bear my soul...well here you go...for more than 2 years I made this recipe multiple times per week, in my sleep...too many times to count. It became second nature to me...so it wasn't until I sat down to write this, that I realized that there is a lot more involved than I thought. I am going to do the best I can to give you all the tips and tricks to perfect cookies...but it takes time and experience, so don't get discouraged! However, I have done all the leg work, and both the cookie and icing recipe are the ones I landed on after MILES and MILES of trials!

What you need...
4 1/2 sticks of butter
1 1/2 cups confectioner's sugar
2 tsp vanilla or other extract, orange & almond are great!
4 cups flour (King Arthur Organic is what I prefer)
1 tsp salt
Mix salt and flour together and set aside. Add the butter and sugar to the bowl of a mixer and cream together until light and fluffy, add vanilla, continue mixing, begin adding flour a little at a time until all is incorporated well. Turn dough out onto a large sheet of plastic wrap. Press dough into a large flat disc, about 1 1/2" thick. Wrap tightly with plastic wrap and refrigerate for about 4 hours, up to a week!
When you are ready pull the dough out and allow to rest for about an hour, until softened. If it's too hard to roll out, give it a little longer and try again! If it's too hard it is REALLY difficult to get it to the right thickness. Lightly flour your work surface and place dough on flour, lightly flour top of dough as well. Using a pastry roller, roll out dough to about 1/2" thickness. Don't be afraid to add more flour to keep the dough from sticking! I usually work with about half the disc at a time!
These pastry/pizza rollers are tough to find, but they are SO much easier! You can always use a rolling pen, but I find that working with this little roller is much more efficient! You can usually find them in kitchen supply stores! They are only about $10, and I use mine all the time for anything dough related!


Once the sheet is full, place in the fridge for 15+ minutes. This is the trick to really maintaining your perfect cutout shape. Let the dough get good and cold perfect attempting to bake them - don NOT skip this!! Preheat oven to 350F, convection if you have it! Bake for 12 minutes or until the edges just begin to turn golden, don't walk away...they can over bake in seconds! Transfer to cooling racks to cool completely. If any bubbles or uneven surface forms, gently press down on the warm cookies with a metal spatula to flatten.

Royal Icing
3 3/4 cups confectioners sugar
4 tsp meringues (I use Wilton and get it at AC Moore, Michaels or Walmart)
1 tsp CLEAR vanilla (if you use regular it will tint the icing slightly almond in color and your whites won't be bright) (I use Wilton and get it at AC Moore, Michaels or Walmart)
1/3 cup water + more if needed
Add the confectioner's sugar and the meringue powder to your mixer, fixed with a whisk/whip beater. Turn to low/2 and allow those to mix well to combine, the egg whites need to be evenly distributed for the icing to set up well! About 1 minute. Add vanilla and water as the mixer continues on low. Scrap the sides to help everything come together, about 1 minute. You want it to just combine to a mixture, it won't look like anything special at this point, don't worry! Once everything is incorporated, turn mixer to high and allow it to whip for about 2 minutes or until peaks form.
This should be the basic recipe for your outlines and details. You can cover and refrigerate this for days. Just make sure it's in a glass container, covered tightly! If it separates, which will only happen if it's refrigerated for a couple weeks, return it to the mixer and whip it again and it will be ready to roll!
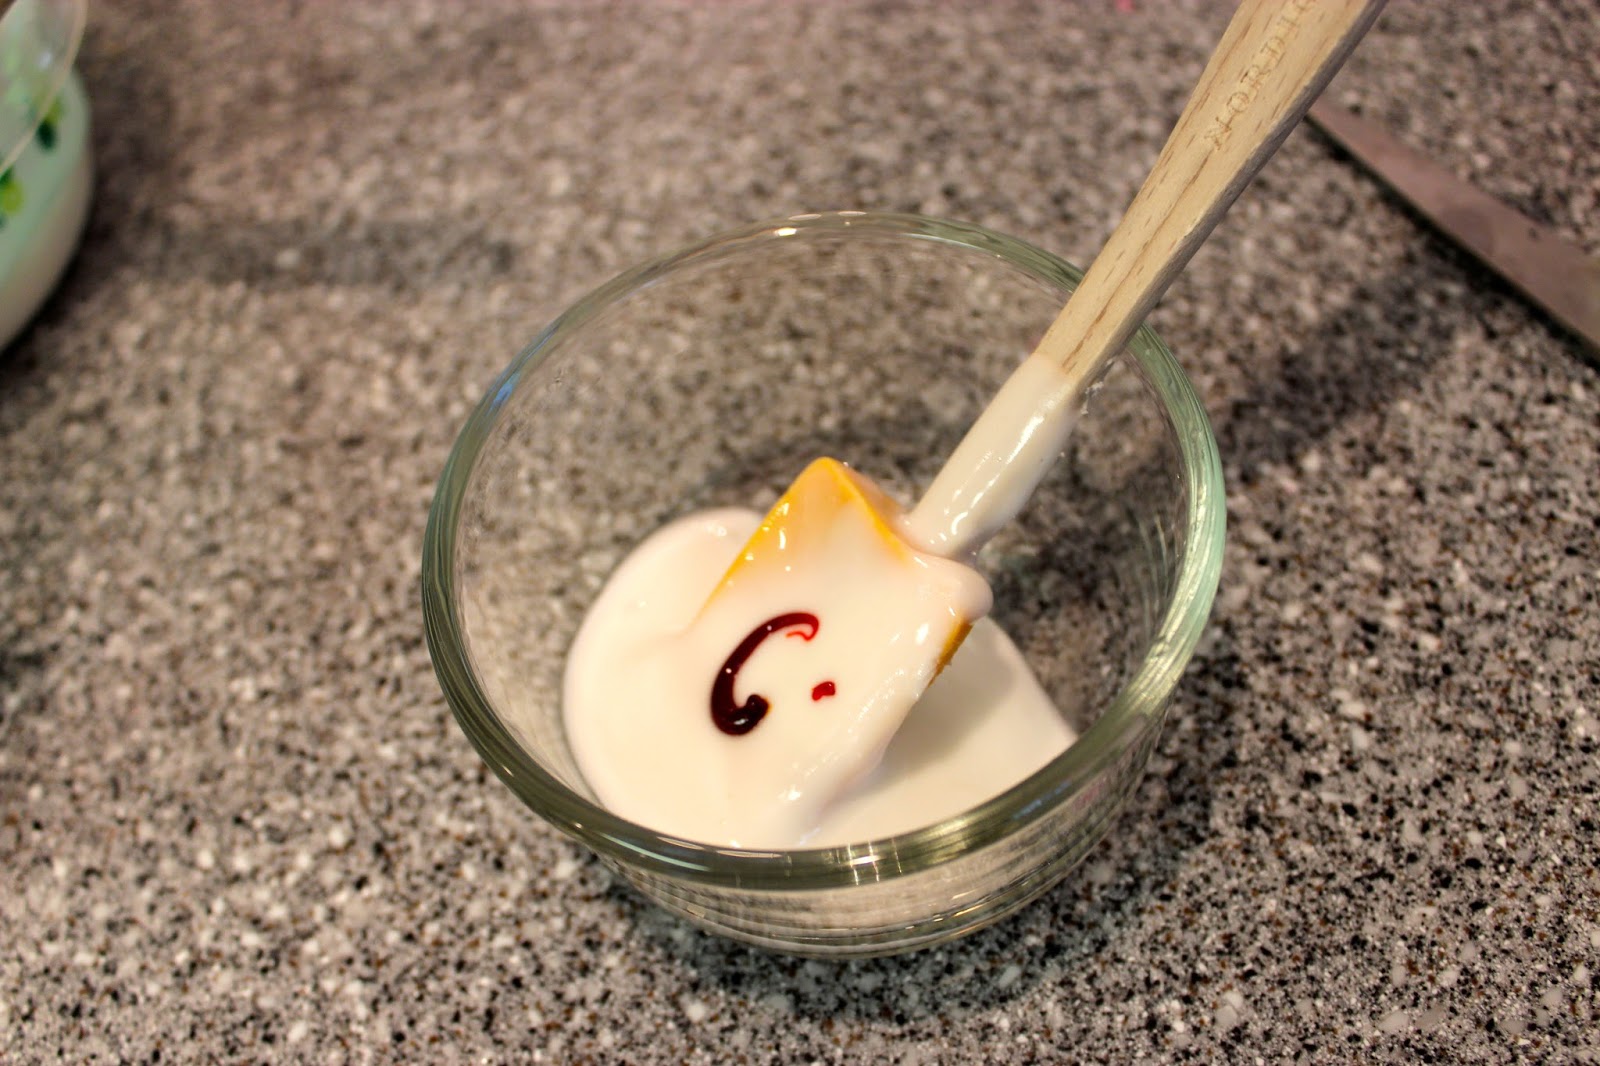
To me, the best way to do your outlines on the cookies, is to use a small bowl and tint a tiny bit of icing, to the desired color. I use gel colors, which you can also get at AC Moore, Hobby Lobby, etc. Water based colors don't work as well with Royal Icing. It only takes a little. I dip a toothpick into the color, if it isn't a tube, and start there. Adding little bits at a time until I reach the color I am looking for.
Once you get the colors just right, place a cheap plastic sandwich bag into a small glass to hold it open for you to fill. Scoop all your color right in and seal. I have used bottles, bags with tips, EVERYTHING...but this is my preferred method. The cheap bags are just thin enough to draw really well and even with thinned icing to fill in tiny spots. The freezer ones are too thick! You will use sharp scissors to clip just the tiniest corner of the bag. You can make the hole larger or smaller depending on if you are outlining or detailing!
I like to do all mine outlines, and then fill everything. If you outline all the cookies and then go back and fill, that gives the outlines enough time to set up just a little! I outline everything, then fill one color at a time.

When you fill, you will want to dilute this icing with only a few drops of water. I use a medicine dropper. When you outline you want your consistency to be like toothpaste, when you fill in spaces, like shampoo. So dilute just until the icing begins to get runny like shampoo! Then it's ready to fill in spaces! Allow the base to cure up for 4+ hours before doing details.
If you need to fill a tiny space, thin the icing and put it into a zippy, clip the corner and fill with that!
So, the thicker icing is for outlines and details once the base coat is complete. The thinned icing is only for filling spaces!
This is just the most BASIC info to get you started! I will continue with lots of tips, tricks and decorating details!!! Please feel free to add comments and questions! This is a ton of info, but I still feel like I am missing SOOOO much! Forgive me if I left anything out. I will continue to read and reread trying to make sure I have everything you need to get started!

What you need...
4 1/2 sticks of butter
1 1/2 cups confectioner's sugar
2 tsp vanilla or other extract, orange & almond are great!
4 cups flour (King Arthur Organic is what I prefer)
1 tsp salt
Mix salt and flour together and set aside. Add the butter and sugar to the bowl of a mixer and cream together until light and fluffy, add vanilla, continue mixing, begin adding flour a little at a time until all is incorporated well. Turn dough out onto a large sheet of plastic wrap. Press dough into a large flat disc, about 1 1/2" thick. Wrap tightly with plastic wrap and refrigerate for about 4 hours, up to a week!
When you are ready pull the dough out and allow to rest for about an hour, until softened. If it's too hard to roll out, give it a little longer and try again! If it's too hard it is REALLY difficult to get it to the right thickness. Lightly flour your work surface and place dough on flour, lightly flour top of dough as well. Using a pastry roller, roll out dough to about 1/2" thickness. Don't be afraid to add more flour to keep the dough from sticking! I usually work with about half the disc at a time!
These pastry/pizza rollers are tough to find, but they are SO much easier! You can always use a rolling pen, but I find that working with this little roller is much more efficient! You can usually find them in kitchen supply stores! They are only about $10, and I use mine all the time for anything dough related!
 |
| Pastry roller! |
 |
| See the thickness of the dough... |
Once you have your dough rolled out to an even field, use cookie cutters to cut out shapes - metal or plastic are fine! Carefully transfer them to a parchment lined baking sheet, using a spatula. Leave about an inch in between cookies. Continue rolling up your scraps and reusing them until all your dough is gone!
Once the sheet is full, place in the fridge for 15+ minutes. This is the trick to really maintaining your perfect cutout shape. Let the dough get good and cold perfect attempting to bake them - don NOT skip this!! Preheat oven to 350F, convection if you have it! Bake for 12 minutes or until the edges just begin to turn golden, don't walk away...they can over bake in seconds! Transfer to cooling racks to cool completely. If any bubbles or uneven surface forms, gently press down on the warm cookies with a metal spatula to flatten.
The yield varies depending on the size of your cookies, but this batch of dough made 4 dozen medium sized cookies! Enough for me to decorate a few examples, and the kids to put the details on the rest at our Easter party!
Royal Icing
3 3/4 cups confectioners sugar
4 tsp meringues (I use Wilton and get it at AC Moore, Michaels or Walmart)
1 tsp CLEAR vanilla (if you use regular it will tint the icing slightly almond in color and your whites won't be bright) (I use Wilton and get it at AC Moore, Michaels or Walmart)
1/3 cup water + more if needed
Add the confectioner's sugar and the meringue powder to your mixer, fixed with a whisk/whip beater. Turn to low/2 and allow those to mix well to combine, the egg whites need to be evenly distributed for the icing to set up well! About 1 minute. Add vanilla and water as the mixer continues on low. Scrap the sides to help everything come together, about 1 minute. You want it to just combine to a mixture, it won't look like anything special at this point, don't worry! Once everything is incorporated, turn mixer to high and allow it to whip for about 2 minutes or until peaks form.
This should be the basic recipe for your outlines and details. You can cover and refrigerate this for days. Just make sure it's in a glass container, covered tightly! If it separates, which will only happen if it's refrigerated for a couple weeks, return it to the mixer and whip it again and it will be ready to roll!
To me, the best way to do your outlines on the cookies, is to use a small bowl and tint a tiny bit of icing, to the desired color. I use gel colors, which you can also get at AC Moore, Hobby Lobby, etc. Water based colors don't work as well with Royal Icing. It only takes a little. I dip a toothpick into the color, if it isn't a tube, and start there. Adding little bits at a time until I reach the color I am looking for.
 |
| Gel colors... |
 |
| Get set... |
 |
| Mix colors... |
 |
| Once you mix your color, place a plastic baggie into a small glass and fill with icing! |
 |
| I use the cheap HT brand sandwich size bags. The freezer kind are too thick and don't work well. Once filled, clip the tiniest bit off the corner for easy drawing! |
 |
| I like to fix ALL the colors I will be using ahead, so that I can just decorate, because this is the part I love! |
I like to do all mine outlines, and then fill everything. If you outline all the cookies and then go back and fill, that gives the outlines enough time to set up just a little! I outline everything, then fill one color at a time.
 |
| I left all these blank with just the base coat for the kiddos to put details on! |
 |
| Use your imagination! Anything is possible! I have done hundreds of different cookies! Quite a few CRAZY ones that people asked for and I had no idea how to even begin! |
When you fill, you will want to dilute this icing with only a few drops of water. I use a medicine dropper. When you outline you want your consistency to be like toothpaste, when you fill in spaces, like shampoo. So dilute just until the icing begins to get runny like shampoo! Then it's ready to fill in spaces! Allow the base to cure up for 4+ hours before doing details.
If you need to fill a tiny space, thin the icing and put it into a zippy, clip the corner and fill with that!
So, the thicker icing is for outlines and details once the base coat is complete. The thinned icing is only for filling spaces!
This is just the most BASIC info to get you started! I will continue with lots of tips, tricks and decorating details!!! Please feel free to add comments and questions! This is a ton of info, but I still feel like I am missing SOOOO much! Forgive me if I left anything out. I will continue to read and reread trying to make sure I have everything you need to get started!
 |
| Vacation Bible School Olympic Medals |
 |
| Monograms |
 |
| Christening |
 |
| The Christmas Story |
 |
| Mermaids |
 |
| Paint Palates |
 |
| Girl Scouts |
 |
| Breast Cancer Awareness |
 |
| Open House |
 |
| Bookworms |
 |
| Bumble Bee First Birthday |
 |
| One of my all time favorites! |
Subscribe to:
Posts (Atom)