Saturday, April 30, 2016

Staying in the Safe Zone

Spring is here and entertaining is on the rise! That doesn't have to mean you can't stick to your goals! 
Headed to a friends tonight, but we will be taking this yummyness along as our contribution! If you have a healthy side item, you can always count to pair it with a Protein and stay in the safe zone!!

Anti-Pasta Salad but this time I left out the olives and added a can of rinsed and drained garbanzos since a friend isn't an olives lover! ;)
‪#‎nevergetsold‬ ‪#‎healthyishappy‬ #strongmindstrongbody #summeriscoming


Saturday Tip! Canned Foods...

Saturday Tip Series - A New part of the blog!

I thought that I would make this a new addition!  There are so many little tid-bits that I use as my best practices...things I have learned along the way, things that help out, save time or are just a healthy tip!

For today, let's talk canned foods!

I don't LOVE canned foods, honestly.  They are usually packed with tons of sodium and preservatives! I prefer frozen, which are much cleaner, no added sodium and usually they are flash frozen at their peak!  Where I can use frozen fruits, veggies, etc.,  I always do!  I stock up when all of my go-tos are on sale.  Fresh is always best, but frozen can be a close second...and let's face it, convenience is key!

However, there are some canned items that are unavoidable!

For Tomatoes, always look for low sodium, BPA free liner, and check for added sugar!  I find that Fire Roasted Tomatoes generally are free of added sugar.  Most canned and jarred tomatoes have added sugar, so check!!!  Tomatoes are one of the Dirtiest Conventional Veggies, so buy Organic on those!

Anything else, I always make sure to give a good rinse!  Anytime I open a can of garbanzos, artichokes, black beans, etc., they go straight into a colander and get a hefty rinse!  Who wants any of that sodium goop in their recipe?  UGH...not I!  It won't get rid of all of it, but some....and that's better!

Hope this helps!

Saturday, April 23, 2016

Garlic Cauliflower Mash

I have posted my Boursin Cauliflower Mash before, which is a favorite, but this is a more simplistic version!

There are lots of options for Cauliflower Mash!  Sometimes I top mine with sautéed mushrooms, or even treat it like super spuds and top it with crumbled bacon, cheese, broccoli, etc!  This is such a fabulous dish and so versatile!  Makes a great "mashed potato bar" for the holidays too!  Just add martini glasses filled with toppings like you would see at a shrimp and grits bar!!!!! Enjoy!

*It can be made ahead and kept in the fridge until 40 minutes before!  Perfect for when you are having company for dinner or know you have a busy day!

What you need...
2 frozen bags of cauliflower (if you can't find you can use raw)
2 tbsp. butter or ghee
1-2 cloves garlic, chopped
1 tsp sea salt
1/2 tsp pepper
dash of paprika

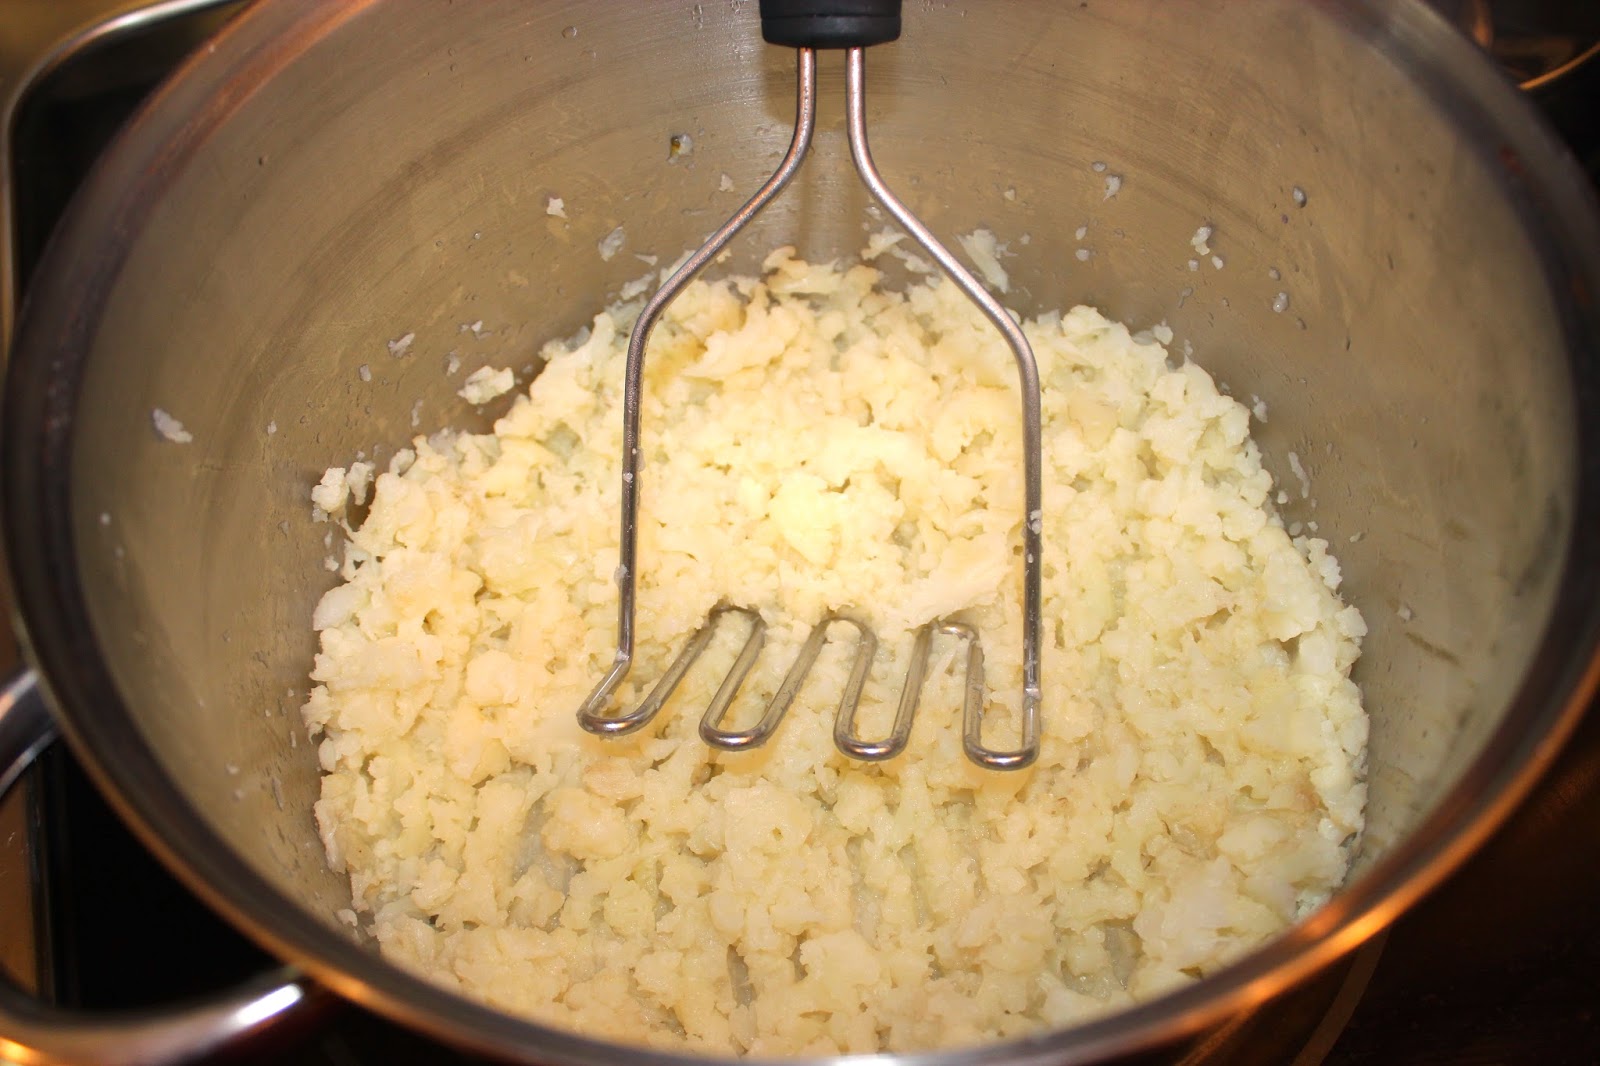
Pour 2 frozen bags into a large microwave safe container, add 1/4 cup water, cover.  Microwave for about 8-10 minutes or until steamed and soft.  Drain water off and mash well with a potato masher! 

Meanwhile, preheat oven to 375F and add butter/ghee and chopped garlic to a small microwaveable dish.  Microwave for 1 minute or until the butter is melted and the garlic is very fragrant.  Add butter mixture and salt/pepper to the mashed cauliflower.  Stir ago combine and continue to mash until desired consistency.  This only takes a minute.  Turn the mashed cauliflower into lightly greased oven safe dish and top with a sprinkle of paprika then cover with lid or foil.

(Refrigerate until needed or take it straight in to the oven!)

Bake covered for 30 minutes, uncover and allow it to bake for 5 minutes! Serve!

If you have made it ahead, remove from the fridge about 20 minutes before baking, and up your baking time about 5 minutes!


Basic Cauliflower Rice

I use cauliflower rice in tons of my recipes.  It is such a nice substitute for grains, is such a healthy crucifer and is bland enough to not overpower other flavors when you are trying to create a food makeover!

2 Great Methods for Easy Cauliflower Rice

Harris Teeter has stared selling frozen cauliflower!  It has been on sale lately $1/bag!  I have stocked up!  Simple!

 Pour 2 frozen bags into a microwave safe container, add 1/4 cup water, cover.  Microwave for about 8-10 minutes or until steamed and soft.  Drain water off and mash well with a potato masher!  Leave uncovered for about 15 minutes so the steam can rise off and it won't get mushy!  HOLY EASINESS!!!!!

OR

Take 1 head of cauliflower, cut the stem and leaves off and wash it.  Place about 2 inches of water in the bottom of large pot fitted with a steamer in the bottom.  Place the cauliflower onto the steamer, cover and turn to high heat.  It will start steaming very fast.  Allow to steam well for about 10 minutes, then turn off and leave covered for about 5 minutes.  Remove from pot.  Sometimes it still stays together sometimes it starts falling apart.  I put it into a large bowl and then break it up, mashing it apart with a potato masher.  Leave it uncovered and allow the steam to rise off so it isn't mushy!  After about 10 minutes, add it to your recipe or store covered in the fridge until needed!


Some Apologies, Admissions and Righting of the Mothership...

Almost 2 years ago I started this blog in response to the many people who kept asking me how I balanced life, kids, the house, everything, and seem like I have it mostly together.  It began with several posts about how I planned, prepped, cleaned, and simply kept the Mothership organized, including some recipes people asked repeatedly for.

Quickly, it became more about the recipes, and a little less about how we actually do it...

I'm not sure if that was because so many Moms kept asking for more healthy, easy, family-friendly recipes, if it was my LOVE of cooking and food, or because it's SO hard to really explain how we do it all.   Because sometimes we don't...sometimes I feel all out of whack, like an unraveling Mom, and at those times I certainly have no room to tell anyone how to do anything....

Honestly, I feel completely stuck so often.  I get so many people sending me messages telling me how much they rely on my recipes and blog posts, because it inspires them in various ways.  I even have those who ask for more and reach out when I don't post.  I can't explain how much it motivates and inspires ME to hear that I am helping people.  If I can help just one Mom get through a tough day any easier,  we both win.

But then there's the other side of taking the time...  I get a lot of those who poke and jab and make the comments because of all I try to balance....more than I can sometimes for sure!  I get the talking, and the jeers, because I do things my own way, and I don't really feel the need to fit in, most of the time.   But yes, it does hurt my feelings and it has kept me from blogging for periods.   I will never understand why so many women like to break each other down with judgements and chatter, when we all share most of the same battles.  Working Moms and stay-at-home Moms, Moms of 1,2,3,4+ are all so often the unsung heroes of the day.  We are quickly called out for an empty tube of toothpaste or an unfavored dinner item, but not often thanked for the new bar of soap or the fresh sheets on the beds.  It's not everyday that anyone thanks us for wiping their hineys, or the patience that we maintain through repeated conflict resolution; and I KNOW I have never been thanked for keeping my calm during a simultaneous throw-down temper tantrum!  Being a Mom is a tough job...we aren't "paid" on socks matched or lunches made, the only tracker on your performance is the happiness and balance of your family.  We are "paid" in uneventful days with less than normal conflict!  We are paid in the moments that we feel successful, the smiles on our family's faces and the sound of a calm house.  Ladies, we can help each other by giving each other positivity, motivation and appreciation...sympthy and understanding, less judgement and more support!  We are all in the weeds, maybe not everyday...but often at some point each day!

In the last couple of months, I have been fortunate enough to join a group of amazing women who give each other CONSTANT fist bumps and pats on the back!  Who share their successes and their fails and keep it real!  People who help each other keep their head high and be proud of what they do, actually encourage the accountability of tooting your own horn!   They help each other get back on the horse and never criticize, don't look back, just listen and help move forward!  It is a group of people who focus on healthy choices, healthy living and enabling others to reach for higher goals in life and health, which all require DAILY strength.  It has been such an unbelievable experience and realization of how much better life is when we are HELP each other, just how strong we can be as a team and a force.  Quite simply what is does to your self to have enduring support from several strong women, the inner strength and confidence it generates!

Through the few months of working on my self, it has dawned on me that I had gotten to a point where I couldn't accept a compliment without looking down, where I could hardly be in a social setting without constantly feeling judged, where I was afraid to take leaps, because of the fear of failure.  That feeling stinks.  But with the nudge of a couple of amazing women who I respect without  limit, I have rebounded and am ready to tackle some new challenges!  One is Righting the blog, bringing back the variety that it started with and adding a lot of new, with honesty and hopefully strength building for all Moms!

The truth is I don't ever want to tell anyone HOW to do it...some days I have no clue how I am going to make it to bedtime, some days I pray and cry, and some days I cry and pray.  Sometimes I yell and sometimes I give in and order take-out.  Sometimes the pile of laundry looks like a never-ending black-hole, sometimes I feel completely overworked, under appreciated and quite simply drained.  Let's be honest, most of us do!  However, we will all get through it and supporting one another with words, actions and ideas helps so much!

So, I want to say...I don't want to tell anyone HOW to do Motherhood easier or better...I just want to share the things that help me!  Some might work for you, some might NOT...I totally get that!  And now, working on updating and revamping the blog, I am realizing that many of my non-recipe posts are some of my most popular ones!  Several of those are the ones that I have received personal responses to.  I will be including more of those!  More admissions, more brutal honesty, more getting back on the horse!  It's all a balance right?  So, here comes the balancing act!  I hope it's helpful...as always, your feedback is so welcomed...good or bad!  If you are reading this, if you are here, then you are already a Kick-ass Mom who is on the hunt for better than yesterday!  Mount up Ladies, Let's do this thing!


PS Tons of thanks and sincere gratitude to ALL of those who have support me and reached out in any way!!!!!!

Friday, April 22, 2016

Who doesn't LOVE a make-over?

Seriously....a great haircut, a few less lbs., a new muscle popping up, a new outfit, a fun accessory, new make-up, even a mani-pedi....a slight makeover can out a real PEP in your step, right?

Well, sometimes our meals and our meal plans need a make-over too!  The same old, gets BORING and it takes fun, new stuff to keep you on track!  I LOVE attempting recipe make-overs!  That obsession is what helped to motivate me when I started cooking more Primal!

So....here goes!  Please message me or comment below some items, snacks, meals, ANYTHING...that you would like to see a make-over for!!!!  I'll be trying a bunch of new stuff this weekend!  Send me some ideas to add to the ones I am trying!!!  Cheers to a HAPPY HEALTHY FRIDAY!!!!! The planning and Prep happens now!

Thursday, April 21, 2016

Pizza and Wings, yes please!

Pizza chain X sells more than 11 million slices of pizza on SuperBowl Sunday, their biggest sales day, followed by Halloween, New Year's and Thanksgiving Eve (facts courtesy their website).  Yep, it's quick, convenient, hot and simple, but you can do it at home, with cleaner ingredients, make an event for the family out of it, and it's SO much better!!  When you have the ability to choose ALL the ingredients, pizza is not that bad!

Our kids don't just ask for pizza, they ask for homemade pizza bar...they LOVE to "decorate" their pizzas and usually try more combos this way!  We love this meal because when it's warm, we do it all on the grill, when it's cold we move it all inside and bake it in the oven!  I like to make a topping bar, offer up every possible option!  Lay it all out there and then tie each on of them a personal pizza to decorate! Our kids actually love mushrooms, kalamata olives, feta cheese and even spinach!  Anything is good on a pizza! Cruise the veggie aisle!  Beef, broccoli and blue cheese! Zucchini, sundried tomato and smoked gouda!  Shrimp, spinach, cilantro and feta! The trick is to max out the toppings and use a little less cheese!

Note: For the kids, they each get a piece of parchments paper with their crust on it, then decorate it, and we bake them all at once!  Just seems easier!

Invest in a great pizza pan!  It makes a huge difference on the crust!  Check out my recommendations!  It took my husband burning up several of my oven rated pans before I found the awesome grill rated one from Williams Sonoma, which I got for him on sale for Father's Day!  Keep an eye out for sales, because I only payed $10 for ours!  And make sure to get HIGH heat rated oven-mits too if you are grilling them, because that kind of heat will melt the standard ones!  We use 2 pans, so we can turn them out quickly!
The Crust.  If you have a pizza place you love, they will usually sell you a dough ball or 2.  Most places these days have a good gluten free crust you can buy like that.  If not, Harris Teeter has a great whole wheat fresh dough, available in the deli.  If you prefer to make yours, King Arthur Flour offers quite a few GREAT crust recipes, several gluten free options.  Just buy good flour, they make good flour, unbleached organic, even white wheat.  I like this crust because it's so simple.   But really, my favorite, and the one I always go back to, probably because it actually has wine IN IT, and uses honey as the feeder for the yeast, is Mario Batali's Basic Recipe.  It fabulous and easy.  I always make it in my mixer using the dough hook and you barely need to do anything by hand!  I love this dough, but it also brings back memories of my food travels with my husband, before we were married.  We ate at one of Batali's Bistros and had his White Clam Pizza - life changing!  It taught me that you can really put anything on pizza!  Try it out, I love goat cheese, beets, bacon and spinach on mine!


For the pizza...
Pick your crust and bring it to room temperature before beginning!

Sauces, there are a wide variety.  
Most of the time we use a basic organic pasta sauce as our red base, always have basil pesto, sometimes I crush up some garlic and leave it to marinade in a 1/2 cup of olive oil for the day and use that.  If I am craving a white base, I will mix garlic olive oil with a bit of ricotta and fresh parsley.

Toppings are endless, our standard ones are:
Uncured Turkey Pepperoni
Roasted Red Peppers
Artichoke Hearts
Uncured Bacon
Sauteed Mushrooms
Kalamata Olives
Spinach
Sauteed Onion
Sundried Tomatoes
Roma Tomatoes
Beets
Shrimp
Chicken Sausage
Goat Cheese
Feta Cheese
Blue Cheese
Mozarella Cheese
Havarti Cheese
Parmesan Cheese

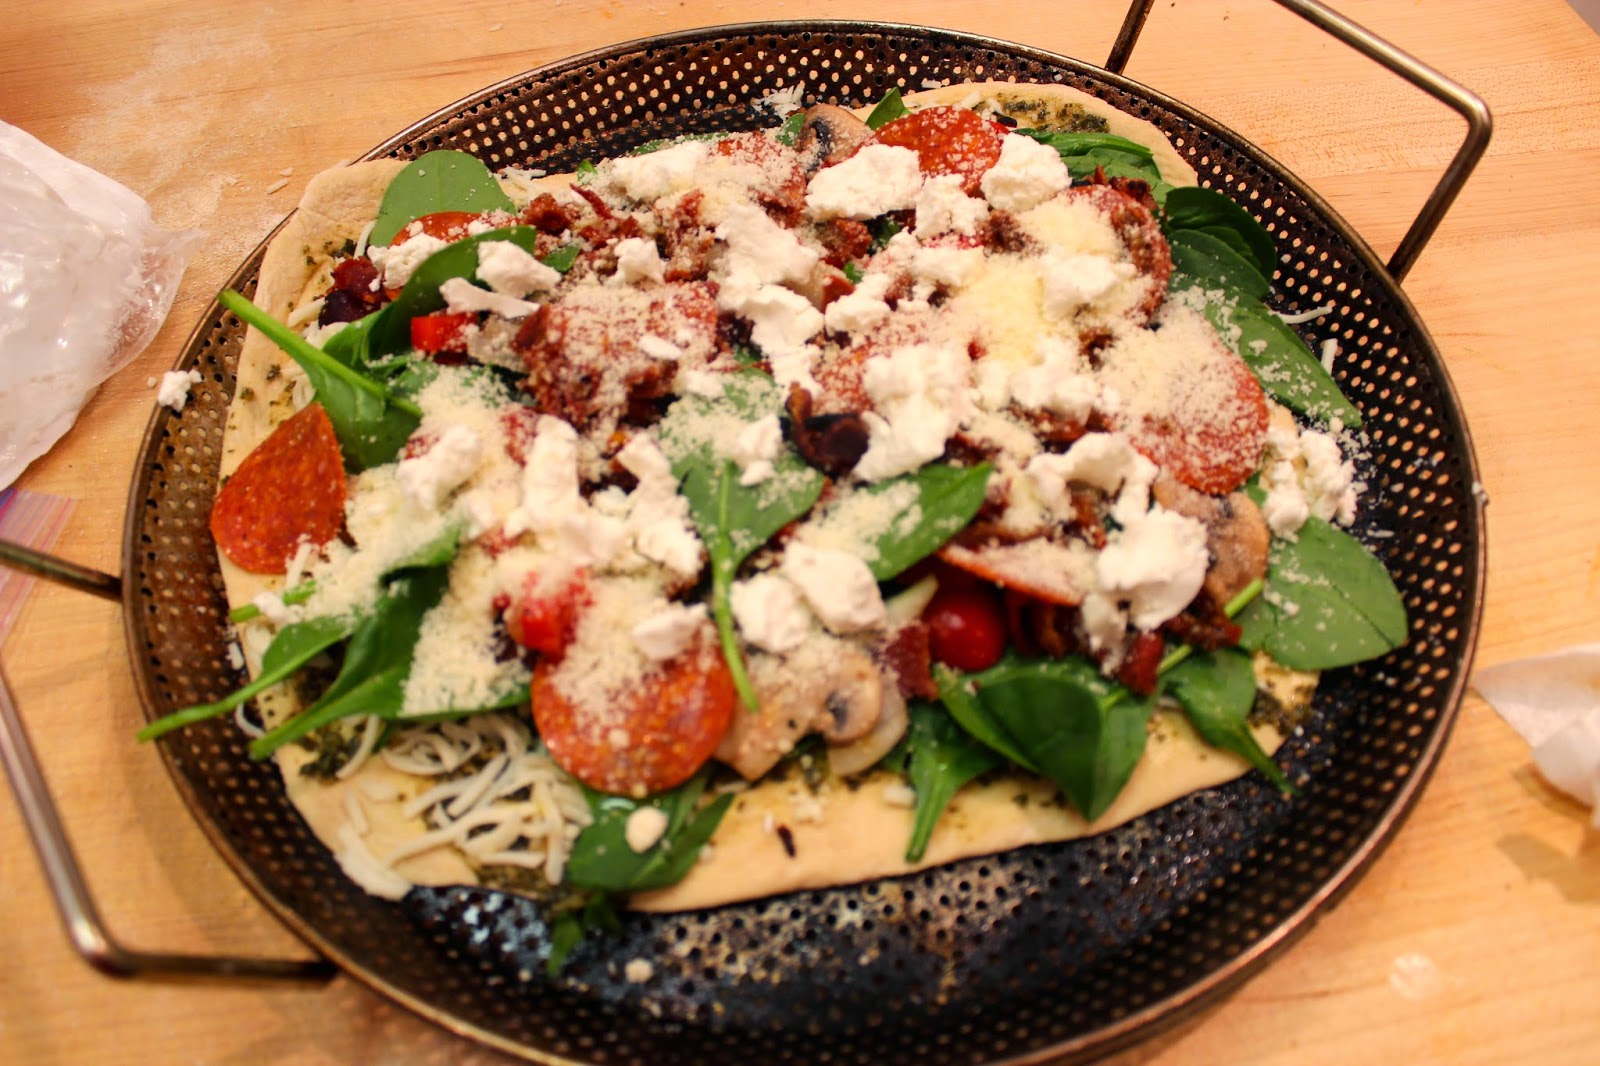
Preheat oven to 425F.  Get all your toppings ready and easily accessible ahead of time!  Flour your dough area and roll out all the dough first.  Place dough on lightly greased pan.  Top with a layer of sauce, then a light layer of cheese.  "Decorate" with your choice of toppings.  If you are wanting greens, I always put spinach and herbs on top with a light layer of cheese so that the greens don't dry out during cooking!  Or you can put them right on top of the cheese base, just don't sandwich too much spinach in the middle or it can get flaky!  Always finish with a layer of cheese on top, it doesn't take a ton!  Place in the oven and bake for 20 minutes or until crust is crusty on the bottom and all these cheese is melted. 

If we are grilling, we put a quick grill on ALL the crusts first.  About 5 minutes on medium/hi - don't forget to grease your pans every time! Then we bring all the crusts in and put them on cooling racks, ready for sauce!  From there, sauce, cheese, toppings, then back on the grill only for a couple of minutes, or broil in the oven for 3-5 minutes.

Always, put dough on the pan before saucing or decorating!  Pizzas full of yummy toppings are tough to move before they get baked!

Ready the topping bar...

Dust your surface with flour and roll out dough to about 1/4" thickness, transfer to a pan BEFORE adding sauce or toppings.

Use a great pan and don't forget to spray it first!

Transfer dough...

Add sauce and cheese...

"Decorate" your pizza...


Waiting patiently for oven space...

Done...

For the Wings...
I use my same recipe for Grilled Chicken Wings 
Instead of grilling:
Preheat oven to 425F.  Using tongs, remove wings from marinade and place into a non-stick pan.  Cover tightly with foil.  Place into oven and cook for 30 minutes or until they reach 165F.   For  a crispy wing, finish on broil for 3-4 minutes!!! Serve.


Wings, Roast covered for 30 minutes.  For a crispy wing, finish for 3-4 minutes on broil!


Boursin Cauliflower Mash

OK already!  I made this for the teachers at our Day School last year and ever since, I get asked for it ALL the time.  I can't believe I am sharing this!  It's so easy and a great recipe to make people think you rock...But the most notable thing about this is...I made this for my Dad and he totally thought it was mashed potatoes!  To fool Mr. Southern Rice, Potatoes, Grits... and all else that is starchy and white...a major feat!  Isn't it wonderful to feed someone something really healthy and them actually think it's the not so healthy version!  Feels great!

So even though this does include a bit of dairy, it is Primal and the BEST potato alternative I know!  Usually I make our cauliflower mash with just a tiny bit of butter or ghee and salt & pepper...but when I am really craving mashed potatoes - this is where it's at!!!!!!


There are lots of options!  Sometimes I top mine with sautéed mushrooms, or even treat it like super spuds and top it with crumbled bacon, cheese, broccoli, etc!  This is such a fabulous dish and so versatile!  Makes a great mashed potato bar for the holidays too!  Just add martini glasses filled with toppings like you would see at a shrimp and grits bar!!!!! Enjoy!

Boursin Cauliflower Mash, it's so easy you can do it in a flash!  Heehee!

*Plus, it can be made ahead and kept in the fridge until 40 minutes before!  Perfect for when you are having company for dinner!

What you need...
1 head cauliflower (I used 1.5 here because I was serving 8) or *2 frozen bags (see update below)
2 tbsp. butter or ghee
1 package of Boursin cheese (any flavor)
1-2 cloves garlic
1 tsp sea salt
1/2 tsp pepper
dash of paprika (mostly for garnish)
1/4 cup shredded cheese for top (optional)

Wash the cauliflower and remove the stem/leaves.  It's okay to leave the head itself whole for steaming, but if it breaks apart, that's fine too.  Place a steamer in the bottom of a large pot and add about 1" of water.  If you don't have a steamed for your pot like this one, it's okay, use what you have or just put the cauliflower into the water.  (You will just want to remove it and drain it well because too much water it in won't make for good mash!)

Cover and turn to high heat.  Once it begins to boil and the lid starts to perk, allows to boil for 10 minutes, then turn the heat off and allow to sit for 10 more.  Remove cauliflower from pot, drain and cool for about 15 minutes.

Add butter and chopped garlic to a small microwaveable dish and microwave for 1 minute or until the butter is melted and the garlic is very fragrant.  Place cauliflower back into the pot and mash with a potato masher or large wooden spoon.   Add Boursin cheese, butter mixture and salt/pepper.  Stir and continue to mash until desired consistency.  This only take a minute.  Pour into lightly greased oven safe dish with lid or cover with foil (if you are wanting a twice baked potato feeling add cheese now).

Preheat oven to 375F. Top with a light sprinkle of paprika.   Cover and refrigerate until needed or take it straight in to the oven!

Remove from fridge about 15 minutes before baking. Bake covered for 30 minutes  (40 if it has been refrigerated ahead).  If you have topped it with cheese, allow it to finish uncovered for 5 minutes to get that browned and bubbly effect! Serve!

***Harris Teeter has stared selling frozen cauliflower!  It has been on sale lately $1/bag!  I have stocked up!  Pour 2 frozen bags into a microwave safe container, add 1/4 cup water, cover.  Microwave for about 8-10 minutes or until steamed and soft.  Drain water off and mash well with a potato masher!  Leave uncovered for about 15 minutes so the steam can rise off and it won't get mushy!  HOLY EASINESS!!!!!***


Monday, April 18, 2016

Summer Succotash


Don't you just like to say? Succotash....Succotash...haha...I don't but I love funny words!  My kids do and I think it's partly the name that makes them love it!  It's kind of like Whoppie Pie...Tucker LOVES to say that one!

But really, the kids do love this and it goes well with practically anything!  We do it with Paleo BBQ and with Honey Balsamic Chicken Wings!  It's easy and just a nice load of veggies!  It's REALLY divine along ice a big fat beefsteak tomato...ohhhhweeee...talk about a Southern  Meal...YUM!

I'm not a huge fan of corn in our diet, but the kids love it and it helps to get them to eat a slew of other veggies in this!  You can always switch up the veggies depending on what you have on hand!  Of course any color pepper works, I just like to get as many colors in there as possible!

What you need...
olive oil
12 oz. bag frozen limas
1/2 sweet onion, chopped
12 oz. bag frozen corn (I like Alexia)
1/2 red bell pepper, chopped
1/2 yellow bell pepper, chopped
1/3 cup feta cheese
a handful of fresh basil, chopped
1 tsp black pepper
*even a can of diced tomatoes

Start by cooking your limas according to the directions.  I usually boil them for about 3/4 the suggested time and they finish cooking during the sautéing - you can always do those ahead!

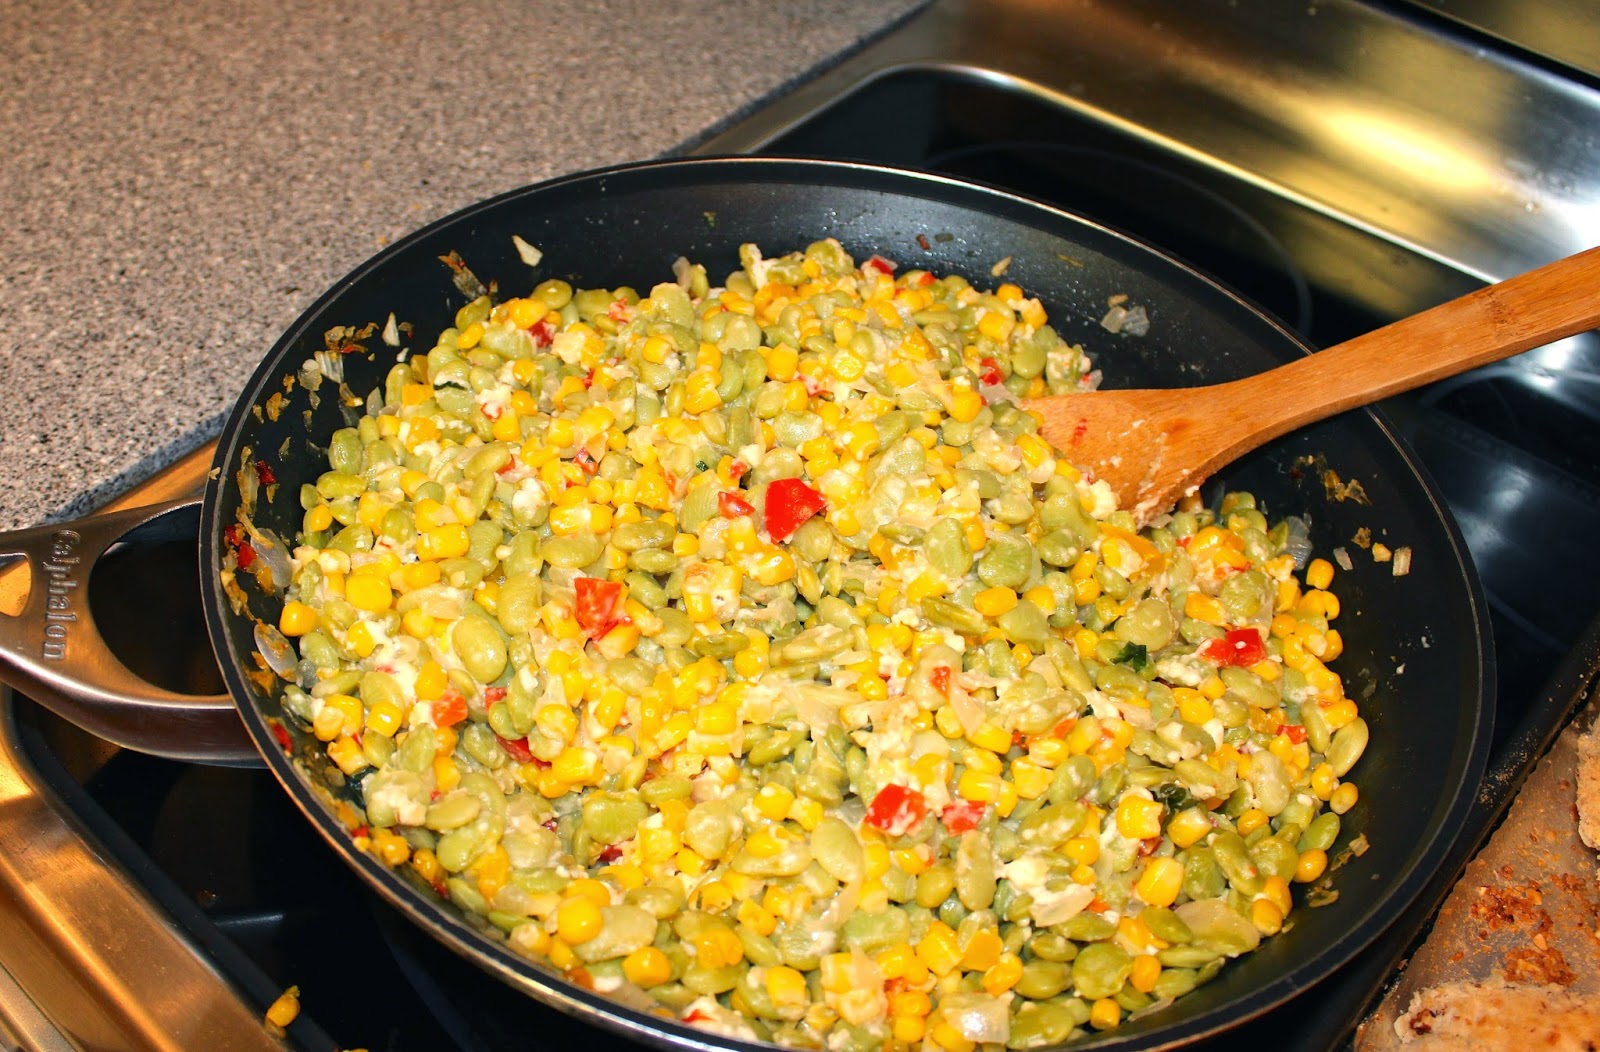
Place onion and peppers into a large sauté pan and drizzle with olive oil, a 1-2 count is enough.  Saute on medium-high heat until they begin to soften, about 3 minutes.  Add the frozen corn and the limas and continue to cook, stirring a few times.  Cook until completely warmed through about 6-7 minutes.  Turn off the heat, add the feta, basil and pepper and stir to combine.  Serve warm!
* I don't usually add salt to many things, just personal preference; however, I make up for it with pepper! ;)


Place onion & peppers into a sauté pan and drizzle with a 1-2 count of olive oil.  Sauté on med/high heat until they start to become softened.  Add the frozen corn and limas and continue to cook, stirring every couple minutes.  


Cook until completely warmed through, about 6-7 minutes.  Turn off the heat, add the feta and basil and stir to combine.  Salt/pepper to taste. 


These are not actors, they are actual consumers! ;)

Turkey Stuffed Poblanos

These are AH-mazing!  Lean and Clean and perfect for a snack or a meal! The make a really nice filling snack, but when we do these for dinner we usually add some Tex-Max Cauliflower Rice or Salsa Salad! They are SO easy to make, only 4 ingredients, little to no prep!

*I have previously posted a similar stuffed pepper, which used sausage, this is just a much leaner option!


What you need...
1 lb. ground turkey
4 poblano peppers
1 can fire roasted tomatoes
4oz. cream cheese

Preheat oven to 400F. Add ground turkey to a large sauté pan and turn to medium-high heat, meanwhile slice center segment and stem out of the peppers, removing any seeds.

Place the peppers into a glass dish and roughly chop the center segments up.  Add the chopped peppers to the ground turkey and continue to cook, breaking up with a wooden spoon until the turkey is cooked through, about 7 minutes.

Add tomatoes and cream cheese.  Continue to cook, stirring frequently, for about 3 minutes or until cheese has melted and all is well combined.

Once your filling is mixed through, use a spoon to fill the peppers.  I like to add filling in the middle, then use the spoon to push the filling towards the bottom of the pepper once you do that, it's easier then to fill from the top end where it's wider!

Once filled, place into preheated oven and bake for 30 minutes! Remove and serve hot or add to containers to cool for snack portions! Cover and reheat when ready!

What you need...

Remove a segment along with seeds and stem...

Add ground turkey and chopped pepper segments to sauté pan and cook on medium-high heat...
Add peppers to glass baking dish...

Once cooked through...

Add tomatoes and cream cheese and cook until combined...

The perfect amount to stuff 4 large peppers!

Bake for 30 minutes!

Either 4 snack portion or 2 dinners!


Sunday, April 17, 2016

It might sound a little silly...Fitting In Your Workout & Getting Motivated *updated*

Completely stunned, overwhelmed, honored and motivated by the many messages I have received in the form of cheers and feedback!  There are so many questions and topics that you want me to weigh in on and I 'm excited to work on every single one! Thank you!

I am hearing many requests for more recipes, and I promise to get those up as soon as I can!  Of course that's a favorite part for me!  But, my reason for starting this blog was to try to help Moms, soon-to-be-Moms and others running a household, to learn some ways to fit it all in and make life run a little more smoothly!  So first, there are many other areas of saving sanity that I need to get to!

Relief comes from getting rid of some of the things that add stress to our lives; that's where organization, fitness, fun, self-esteem and self-time come into play!

Fitness is so important in our family, so I am tackling that first!

If I do not get to exercise, I am NOT a nice person.  It's the one thing of MINE that I make a priority. I have to have that outlet for the stress that life can throw my way and I think it's really important to give yourself a little time investment.  Fitness is a priority in our household, both for us and for the people we are molding our children into.  I know that getting a workout in is SO tough for a lot of Moms, because it takes time, commitment, motivation and makes taking more showers necessary!  Let's face it, we've all been a few days without one after having kids!

I DO fit a workout in everyday...somewhere.  It might not be the be the workout I'd like to get, but you CAN fit it in.  The first of my silly things I do to help myself, is put on my running shoes.  Yes, the FIRST thing... before my coffee, my teeth, everything...I put on my workout clothes and my running shoes.  This way I am always at the ready, should the opportunity present itself!  I have also found that I get more done throughout the day if I have my running shoes on.  Weird, maybe...but true.  I might not always look all cute, but I am getting it done!

Fitbit
I love my Fitbit!  Some weeks I do challenges with people, some I don't; some weeks I only do a challenge with my husband so we can keep track of each other and keep each other moving and drinking our water!  It even allows you to log HIIT workouts and diet!  I love the water log!  I log my wear every time I fill up my cup and it makes it easy to get that gallon in everyday.

I love the Goal Day option.  Sometimes, usually on Fridays, my husband and I will do a goal day and try to get a maximum # of steps that day before we kick off the weekend!  It's fun to look at what % towards your goal you have, who will hit it first and it's motivating to see who is ahead! Plus, it feels good to hit that goal!

It definitely works to keep you moving when those moments creep in of wanting to sit down! I just keep my running shoes in and try to hit my goals!  You can change your daily goal to whatever you want!  I have absolutely found that my best progress comes with both a daily HIIT workout and a hefty step goal, 15-20k!  Some days that goal is easy to get and some days it is NOT!

If you don't know about BodyRock / DailyHIIT, get on that now!  A few years ago a fantastic friend introduced me to www.Bodyrock.tv.  I was stuck at home most of the time, with newborn triplets and a not quite 2 year old, dying to get out and get active again.  She told me that this insane phenomena had saved her when she was stuck at home with a newborn.  This FREE HIIT database of workouts should be on signs leaving the Mother & Baby wing at the hospital.  It can be a stay-at-home Mom's best friend and especially if you have a newborn or small baby who naps those frequent short naps, it's perfect!  These people have hundreds of short high intensity interval training workouts that can be done with almost no equipment and in a small space.  They are generally only 12-15 minutes long, about 50 seconds work/10 seconds rest, interval exercises like push-ups, dips, squats, lunges, burpees, kicks, wood-chops, mountain climbers, etc.  Mostly things you can do with a set of weights, a chair and your body resistance!  Yes, it can be intimidating at first, but it's 50 seconds, you can do anything for 50 seconds.  Trust me, the physical limitations left from carrying triplets don't make getting back in shape easy, but I love this and it totally saved me.  Warning: The people on these videos are really fit and show it, it's kind of like fitness porn, but it works!

No excuses, who can't find 12 minutes?  When everyone used to nap, I would try to fit in 2 Bodyrock workouts, or make my own workout up.  I keep a list of all the exercises I have done on their site, and I will quickly pick 6-10 lower body, and 6-10 upper body and create my own HIIT workout.   This is awesome for me because I have to modify many other workouts because of severe diastisis recti, which many other Moms suffer from!  You will need an interval timer, but there's an app for that!

If it is a really overpacked day, do 10 push-ups & 10 lunges every hour throughout the day.  Between 8am-5pm, you've done 100 of each!  I do this a lot while I am cleaning the house, put sheets on a bed, 10 push-ups, clean a toilet, 10 squats.  Hey - you do what you gotta do and you will be proud of yourself for making it a priority!

Having a tough time getting motivated?  My 3 minute warm up!  Everyone has a hard time pushing off and getting started sometimes.  Today was rough for me!  Coming off of a BUSY active weekend, and I was already sore from a weekend excursion, but it ended up being one of my best workouts in a while.  So....here's where I really begin exposing myself...I begin every single workout the same way...every one!  Anyone who knows me well knows that I never miss a dance party!  All my college girlfriends, are snickering right now!   But really, who ever busted a move to an awesome groove and then said, "that made me feel crappy!" No one!  So everyday I pick a song that strikes me, usually something from my college days or a Latin tune, turn it up and DANCE!  Just one song, about 3 minutes and it's my warm up.  But when I say dance, I mean GET IT!   J. Lo meets Kevin Bacon, Footloose style as if I am a Superstar who was just never discovered...no one's watching and you can let it go!  By the time that song is over, I am always laughing at my skills and ready to work! Get it girl...I guarantee it will help you get going and give you a smile!

Mix it up and track your progress!  I usually run 1-2 days a week and aim to do better than the run before, either farther or faster.  I use the Fitbit app and tracker that logs all your activity, so you can see all your recent runs!  That is SO motivating!
I LOVE Bodyrock, so that makes my schedule often and you can track how many reps you are able to complete in the 50 seconds!  It's amazing how fast you improve.

Check out their channel on youtube.com - Bodyrock they have thousands of videos, long and short!  There are several bootcamps or challenges you can follow.  There are awesome burnouts to add-on, or you can subscribe to a daily workout that is sent to your email.  I like to do their bootcamps all the way through, it leaves no guess work when your time is limited.  You know exactly what time/equipment you need for the next day!  Check out the 21 Day Bootcamp, I think this is my favorite one.  The first couple of days are longer workouts and then the rest are shorter.  I like do add on a bonus or burnout to each one!

P90X3 is another great program that really gets it done in a short time frame, only 30 minutes.  With this program the workouts are varied for you with everything from agility, to Pilates and even yoga.  My husband and I both do the Yoga from this program a couple times per week - my hubs is addicted!  He gets up most days at 5am, just so he can get his P90X3 workout in!  And he has been a Crossfitter for years!

But even more....Get outside!  Get moving!  Pack a picnic and look for a park with trails!  When we take the kids to the park, we take turns running sprints, back and forth by the playground!  Sure, people stare...but then again with triplets they already were.  Play chase!  Studies show that adults who engage in play tend to be fitter in both mind and body!

So there it is!  I wish I could say that I workout for 1+ hours each day, but my life just doesn't afford that.  But this is how I get it done, and it works!  So make a pact with yourself, try it and let me know!! Hope this helps!

Next up...The Lunch Salad


Gumbalaya - The Paleo Version


Gumbalaya - No that wasn't a typo!  This is the convergence of 2 things with similar flavors.  It isn't a Gumbo and it isn't a Jumbalaya - it's my version of both and it's tied up in nice little slow cooker package with a Paleo bow!  So easy and so CRAZY good, it makes you want to channel your inner Emeril - BAM!!!!


What you need...
1 head of cauliflower, leaves and core removed, washed or 2 bags frozen
1 red bell pepper, chopped
2 stalks celery, chopped
1/2 sweet onion, chopped
5-6 cloves garlic, chopped
1/2 green bell pepper, chopped
1 can fire roasted tomatoes
1 chipotle in adobo, more if you like HOT
2 cups okra, fresh if it's in season, frozen if not
1 package Andouille Sausage, cut into 2 inch pieces (I like the Al Fresco, Gilbert's or Aidell's)
2 sprigs fresh oregano
2-3 bay leaves
1 lb wild shrimp, peeled & deveined

Break apart cauliflower with your hands and toss into the crock pot.  Using kitchen twine, tie the herbs together and set aside.  Add the remaining ingredients, reserving the shrimp!  Stir to combine and place the herbs right on top.  Turn to high heat and cook for 3 hours.  Gently mash up the cauliflower with a slotted spoon, stir well to combine and add the shrimp.  Cover and cook for 30 more minutes or until shrimp and pinked and cooked through.  Dish it up and enjoy!


What you need...

Toss in all the veggies...

Pour the can of tomatoes with juice, over the veggies...

Add sausage, chipotle in adobo, and spices, turn to high heat and cover...

Allow to cook for about 3 hours...

Gently mash up the cauliflower with a large slotted spoon...

Add shrimp and cook for about 30 minutes or until shrimp are pink!

Stir to combine and serve!

Yumbalaya!